

Servers you can connect to
| Type | Use it for | How to add |
|---|---|---|
| SMB | Most NAS devices and Windows shared folders | Add server |
| SFTP | A NAS or Linux server with SSH turned on | Add server |
| WebDAV | WebDAV on Synology, QNAP or Nextcloud, or https access from outside your home | Add server |
| DLNA | Media servers on a NAS or router | Shows up on its own on the same Wi-Fi |
| Oulim PC | A PC running Oulim desktop | Add my PC (see ‘Use your PC as a NAS’) |
Tip With DLNA you can browse folders and play, and that’s it. For posters and resume playback, add the same NAS over SMB, SFTP or WebDAV and use Add to library.
Find servers on your Wi-Fi
Open the Network tab and DLNA servers, Oulim PCs and other Oulim devices appear on their own under On this network. Oulim keeps looking for as long as the screen is open.
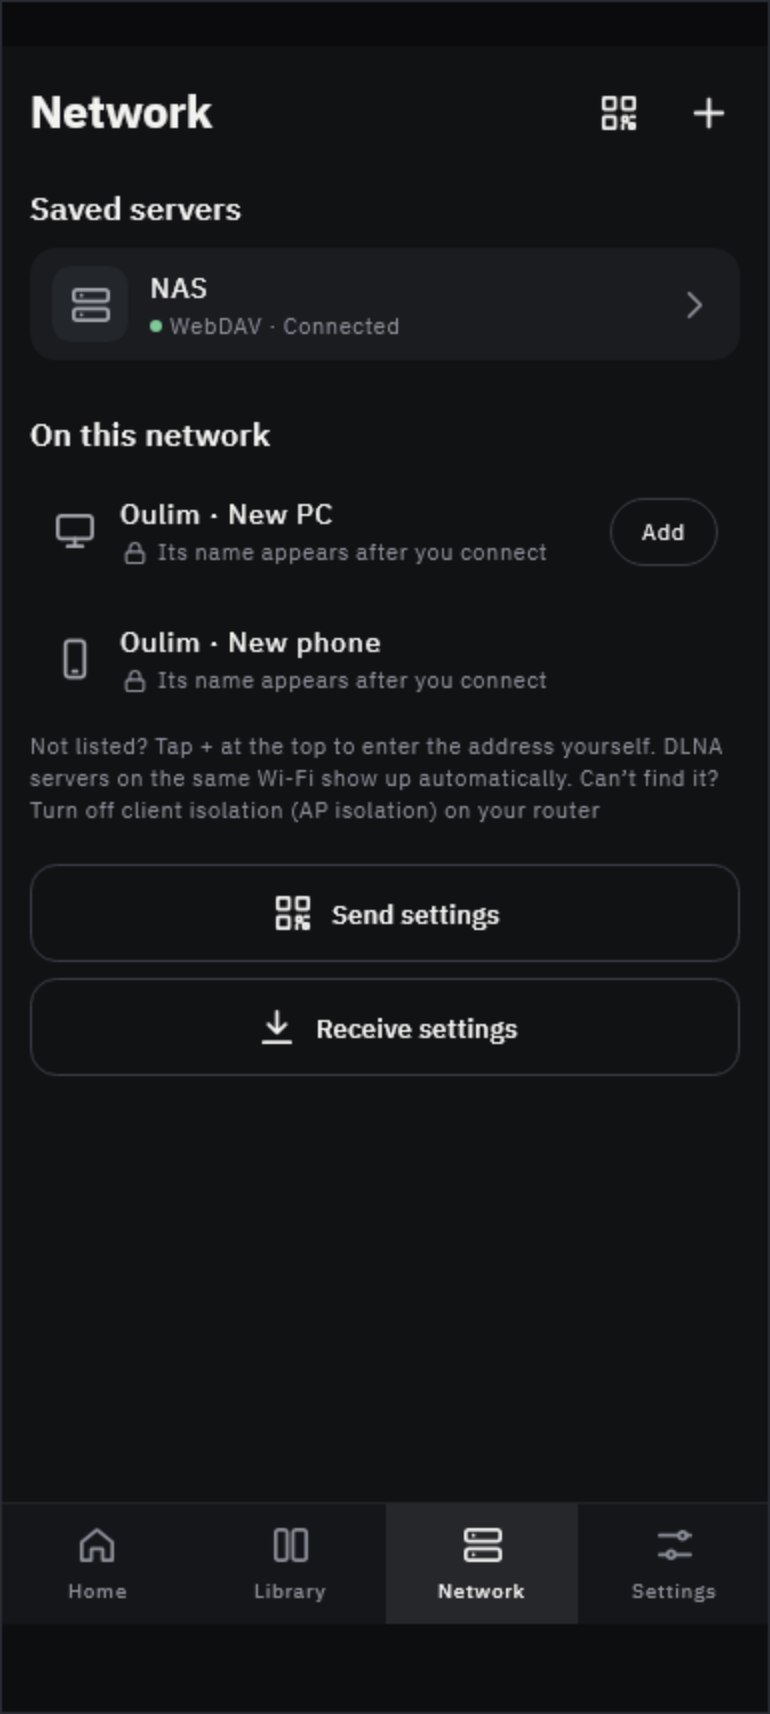
Note Nothing showing up? Check that client isolation (AP isolation) is turned off on your router. Guest Wi-Fi usually blocks devices from seeing each other too. Even if a server isn’t found, you can still connect by typing its address.
Add a server (SMB or SFTP)
- In Network, tap + (Add server) in the top-right corner.
- Pick SMB or SFTP from the tabs at the top.
- In Address, enter the NAS’s IP or name (for example 192.168.0.10 or nas.local). For a non-standard port, add it on the end, like nas.local:2222.
- Enter your Username and Password. If it’s an SMB share that opens without an account, turn on Connect as guest.
- Leave Shared folder (optional) blank to see a list of shares. For SFTP you can also set a Start folder (optional).
- Check it with Test connection, then tap Save. A server is only saved once it connects.
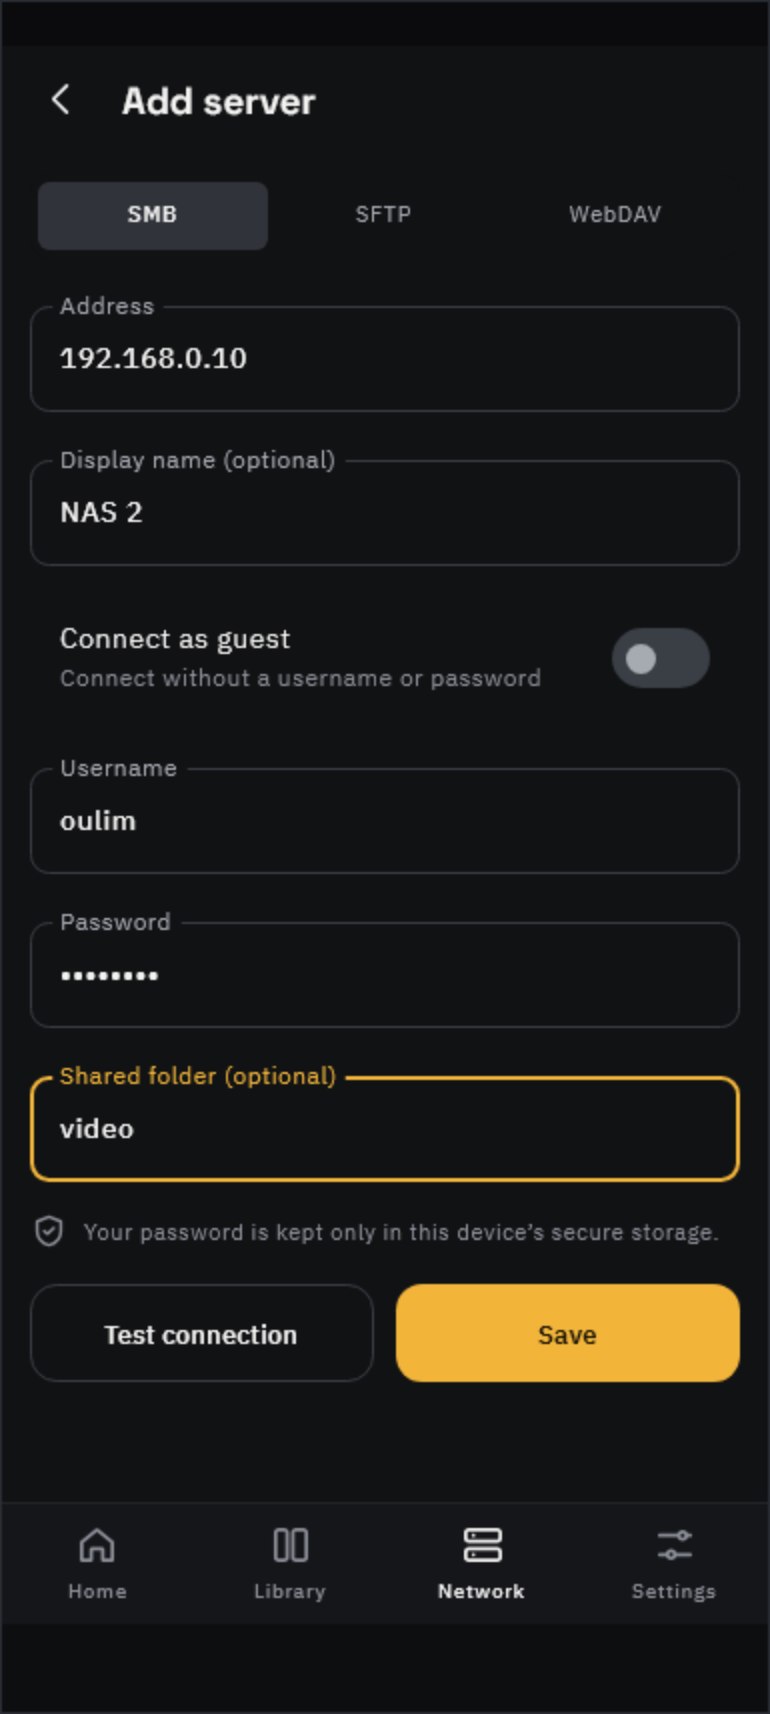
Tip Give it a name like “Living room NAS” in Display name (optional) so it’s easy to spot in the list. If you leave it blank, the address is shown instead.
WebDAV
- Use HTTPS is on by default. Leave Port blank to use 443 (https) or 80 (http). Synology usually uses 5006.
- In Path (optional), enter the WebDAV start folder, such as /video.
- Paste a full address like https://nas.example.com:5006/video into Address and Oulim splits it into the right fields for you.
- If your NAS uses its own (self-signed) certificate, you’ll see Can’t verify this server’s certificate the first time you connect. If it really is your NAS, tap Continue. Oulim remembers that certificate and asks again with This server’s certificate has changed if it ever changes.
Note http isn’t encrypted, so your password travels in plain text. Always turn on https when connecting from outside your home. If you see “certificate has changed” and you haven’t renewed it, don’t connect.
Browse folders and add them to your library
Tap a saved server to open its folders. Tap a part of the path at the top to go back up, sort By name or by Last modified, and switch between Grid view and List view. Tap a file to play it right away.

- Add to library: add the current folder to your library and Oulim finds posters and plot summaries, sorts everything into movies and series, and shows it under resume watching on Home. For naming tips, see ‘Organizing your files and folders’.
- New files you put in a library folder are picked up on the next scan.
- A subtitle file with the same name next to a video loads automatically, even from a NAS.
- On desktop, you can also select a file and press Enter to play it.
If you can’t connect
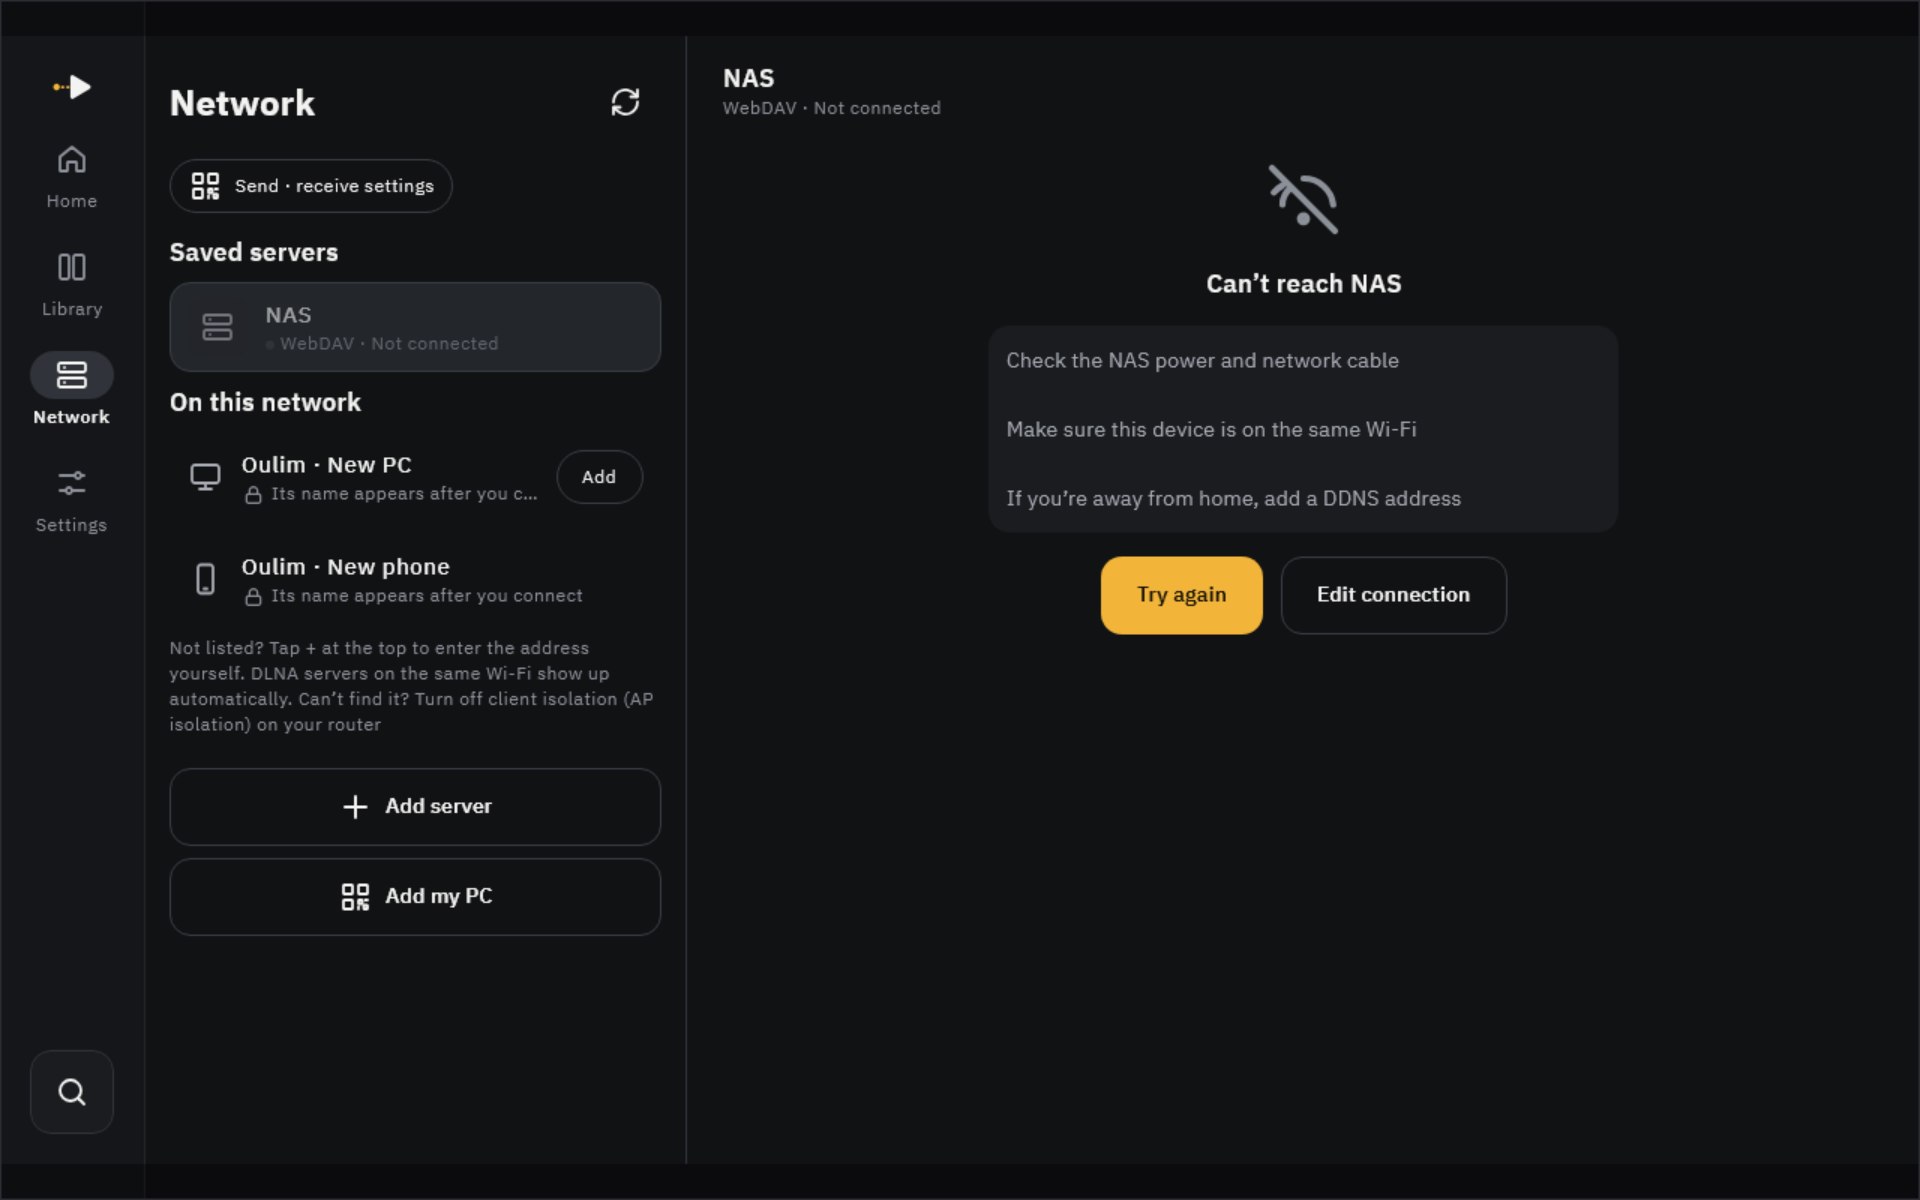
When a server can’t be reached, its dot in the list changes to Not connected, and tapping it brings up a checklist. The app and your library list still open without a connection — you just can’t play.
| If you see | Try this |
|---|---|
| Can’t reach the server. | Check the NAS power and cable, and that this device is on the same Wi-Fi. From outside your home, you’ll need a DDNS address |
| Wrong username or password. | Re-enter them in Edit connection. Also check on the NAS that the account has access to the shared folder and to SMB, SFTP or WebDAV |
| Couldn’t find that shared folder or path. | Clear the shared folder and path fields and try again — you can then pick from a list |
| Couldn’t connect. | Check that the connection type (SMB, SFTP or WebDAV) and port match your NAS settings |
Note Remove server also deletes the library items and watch history that came from that server. If only the address or password changed, use Edit connection instead.
On TV
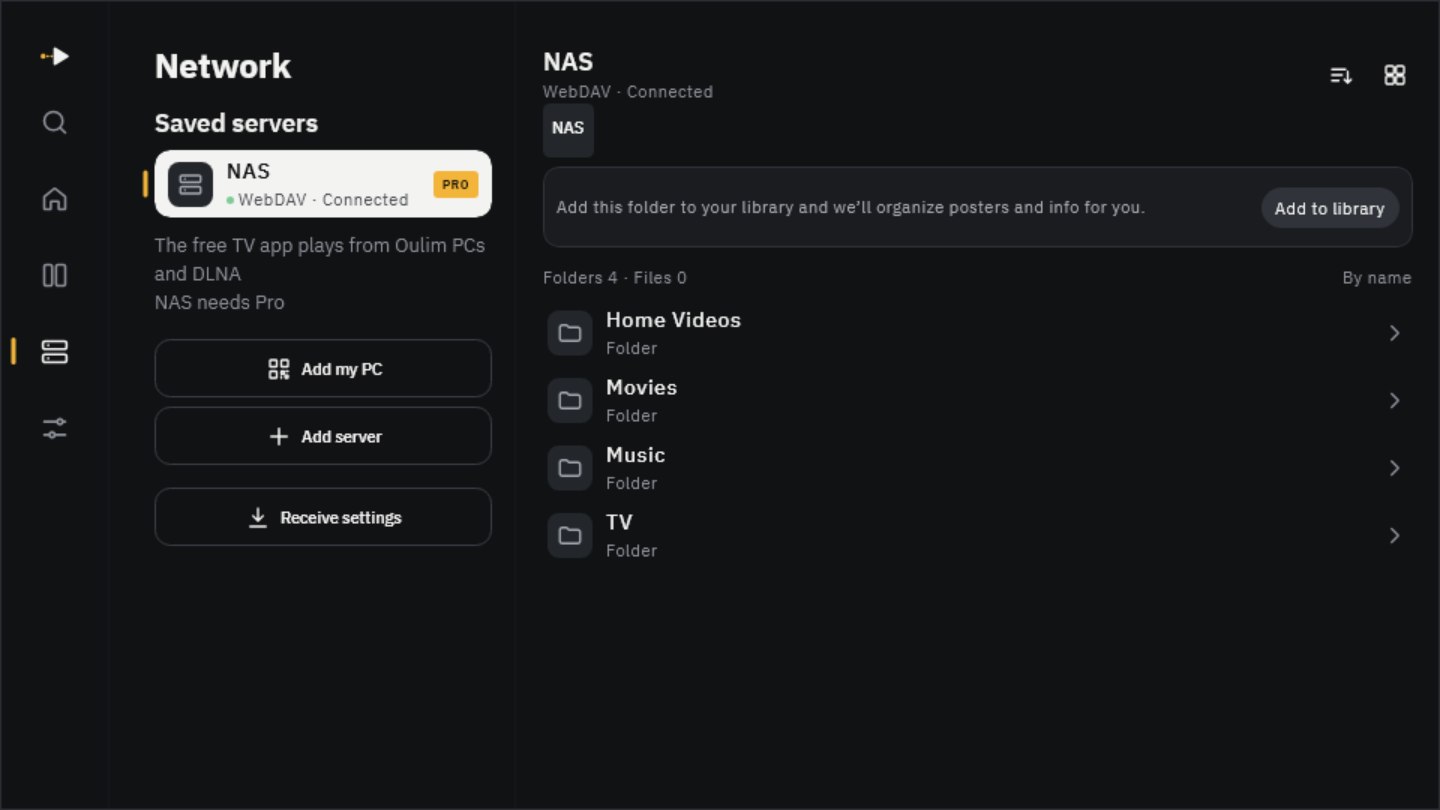
On TV, servers are on the left and folders on the right, side by side. Typing addresses and passwords with a remote is a chore, so we recommend setting things up on your phone first and using Send settings to pass them over.
Send and receive settings between devices
Move the NAS servers, metadata keys and library folders you’ve set up on one device to another. Nothing goes through a server — the two devices send it to each other directly over the same Wi-Fi, encrypted.
- On the receiving device (a TV, say), open Network › Receive settings. A QR code and a 4-digit confirmation code appear.
- On the sending phone, tap Network › Send settings › To a TV or other device (scan QR) and scan the QR code.
- Make sure the confirmation codes on both screens match, choose your Items to send and send them. To leave out passwords, turn off Include passwords — you’ll just need to enter the passwords again on the receiving device.
- On the receiving device, pick what you want and tap Save to bring it in. If a server is already there, you’ll be asked to Replace or Keep both.
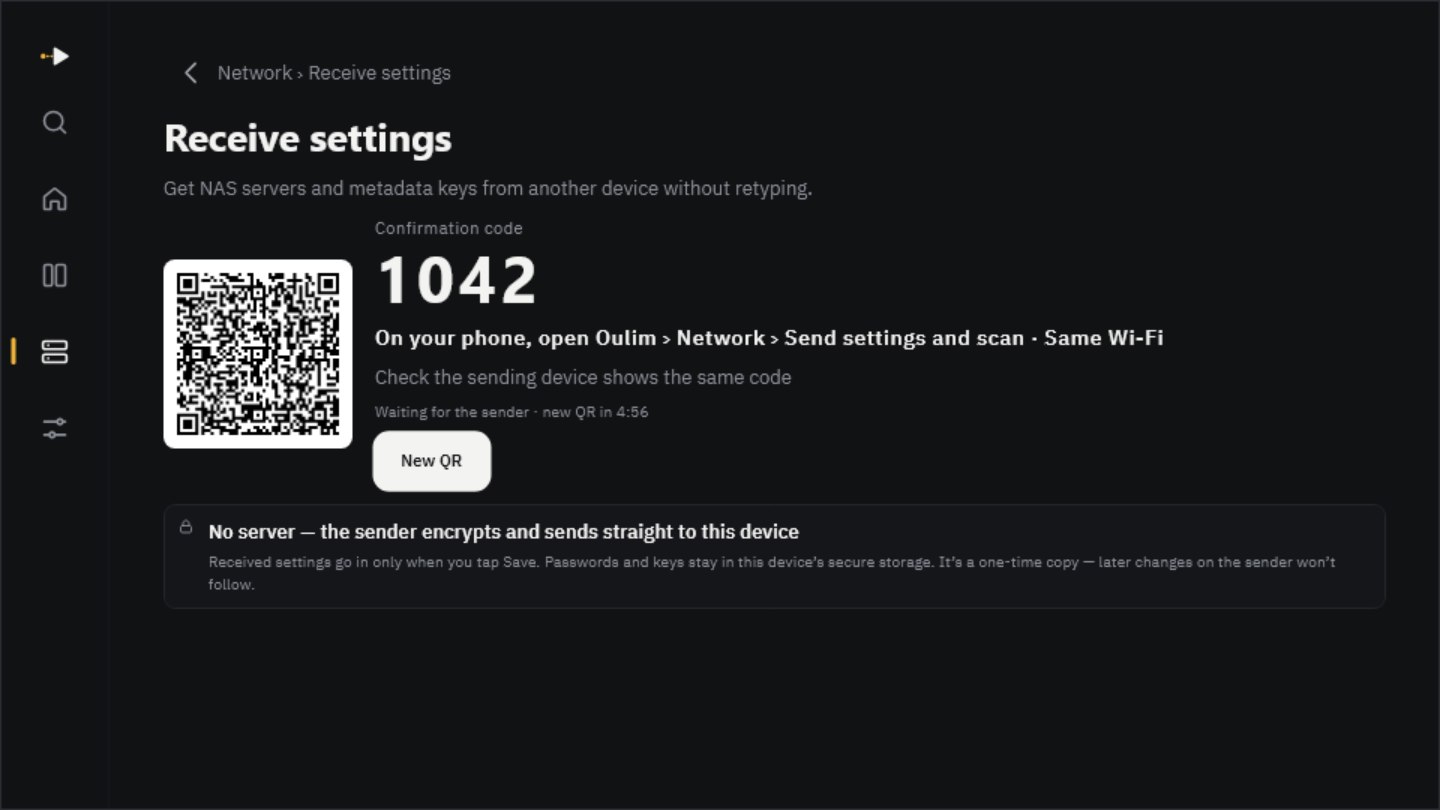
- What you send is a copy. Later changes on the sending device don’t carry over.
- If you’ve registered an Oulim PC, use Upload to PC vault to store your settings there, then Get from PC vault on any device registered to the same PC, whenever you like.
- Per-device settings like playback, subtitles and display aren’t transferred.
Free and Pro
| Free | Pro | |
|---|---|---|
| Add servers and browse folders | Yes | Yes |
| Play from DLNA and Oulim PC | Yes | Yes |
| Play NAS videos (SMB, SFTP, WebDAV) — phone and tablet | 1 hour 30 minutes per ad watched | No ads |
| Play NAS videos — TV and desktop | — | Yes |
| Send and receive settings | Yes | Yes |
Tip Ads only appear when you choose Watch ad and play as you start a NAS video. They never play during a video, and if an ad can’t load, the video simply plays.